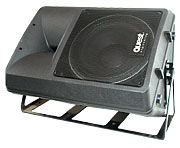
Quest Engineering WB-FS12 combination wall bracket/floor stand assembly instructions.
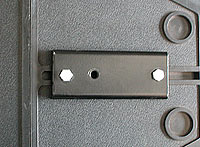 |
Step 1 - Remove the two rubber grommets and attach metal fitting to top of box with the two bolts supplied. Do not over tighten. Light spanner pressure is adequate. |
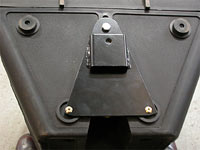 |
Step 2 - Remove the two rear rubber feet from the base of the box. Step 3 - Attach the base plate to the box with the single bolt supplied with light spanner pressure. Secure the rear of the plate to the two empty rubber feet holes with the screws supplied. The box will now have a metal plate secured to both top and bottom. |
 |
Step 3 - Attach the nut and bolt to one end of the cradle with slight free play on the bolt so the nut will spin. |
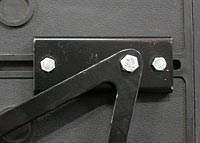 |
Step 4 - Stand the box and cradle on end and locate the cradle so the bolt will align to the top mounting hole and tighten. |
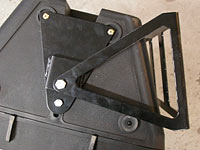 |
Step 5 - Invert box and cradle and locate and insert the bolt supplied into the base of the box and tighten. |
 |
Step 6 - Angle the box to the desired coverage angle and tighten bolts. If mounted over people's head height, an additional safety strap may be required. Consult your local industry regulations. |